I've been buying and tinkering with smart home devices for years. As a result, my home network resembles a kind of Model UN of devices, bridges, protocols, assistants, and apps. I try to broker alliances, resolve disputes, and assure everybody, myself included, that this whole complicated thing is still worth it.
My salvation has been , a little server that gives you . Every device in my home is connected to Home Assistant, which runs on a tiny underneath my printer. I have a custom dashboard with all my switches, sensors, speakers, and lights. I have complete control, a custom dashboard, and infinite automations.
But sometimes, I just want to change the thermostat from the lock screen on my iPhone or tell Siri, on my phone or watch, to turn on a lamp. Yes, Home Assistant has its own app, plus a mobile-friendly website. But I also want to save my partner from learning how an entirely different, somewhat fiddly app works to access lights and switches.
Conveniently, Home Assistant isn't an all-or-nothing proposition. Sure, you can use it to cut the big tech companies out of your smart home and design your own dashboard. But you can also use it as a gateway between a motley collection of non-HomeKit-friendly gadgets and Apple's Home system. Or you can switch between both for more control or easier access.
Let's dig into how Home Assistant can help HomeKit find every device in your home, even the devices it doesn't officially support, for free. It can also connect Google and Amazon's apps and assistants to the rare devices they don't support, though that costs $5 per month (but also supports Home Assistant's development).
One more note before heading deeper: if you only use Apple devices to control your smart home devices, you only care about HomeKit compatibility, and you have a spare Raspberry Pi, HomeBridge is another solution. It's more limited in scope than Home Assistant, but that might be a plus for some folks.
Getting your home in order
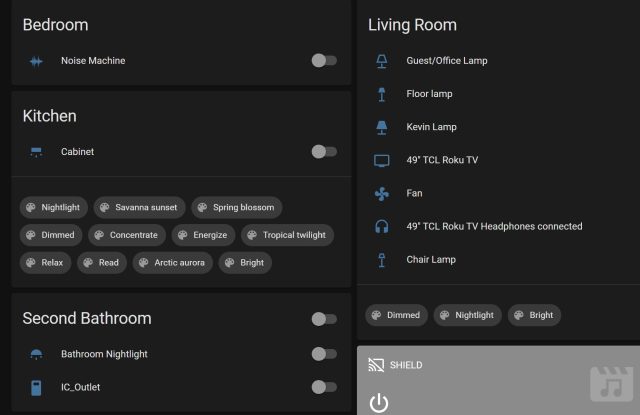
First, you'll want to get Home Assistant up and running and connected to your devices. It's outside our scope here to walk you through that process, but there are many resources you can consult. Start with to get the system running on a Pi, a NUC, a NAS, an always-on system, a Docker container, or in a virtual machine. Basically, Home Assistant can live on any little computer that can always be on.
Once Home Assistant is running, add to it as many of the devices and services in your home (termed "Integrations" in Home Assistant) as you want accessible from your phones or speakers. If you hit a wall, the Home Assistant , , and are good places to look for troubleshooting tips. I've found quite a few tips on , too.
If you've looked in Home Assistant and can't find an integration for one of your devices, consider installing the an unofficial community-maintained compendium of integrations and other add-ons. Search (in the upper-right corner of the HACS page) to see if your device or brand is offered.
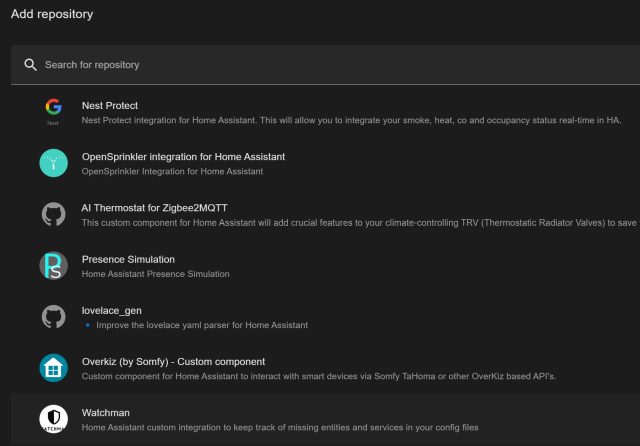
Some HACS integrations may require more work to configure. I had to set up a on a friend's Home Assistant setup to access his Ring pathway lights. For some devices (typically the cheaper, off-brand variety), you might sign up for an API key at a little-known company's developer portal. You can decide whether the extra steps are worth having instant, pull-down-on-your-phone access to these gadgets.
If you already have Home Assistant running and connected to everything and you want to add a HomeKit bridge, you have a special task: Get rid of as many old, redundant, or non-responsive devices as possible. Head to Settings, Devices & Services, and then the Entities tab and sort by status to see what's no longer connected or responding. When you connect Home Assistant to HomeKit, Google, or Alexa, the server sends over entire categories of devices, whether or not they're duplicates or non-responsive. On HomeKit, in particular, it's annoying to get rid of dead or duplicate entries, and the Home app will bug you to configure devices until you do.
Adding your whole Home (Assistant) to HomeKit
When you have your gear loaded into Home Assistant, head to Settings, then Devices & Services, then click the "Add Integration" button. Search for "HomeKit" and add it. You're prompted with a question of which domains you want included in your HomeKit integration. Don't just click through here—uncheck things for which you don't really need HomeKit control. I don't need outdoor climate data, scenes and scripts, media players (Home can't do much with my speakers), or device trackers (Tiles, AirTags) in HomeKit. I do want temperature sensors, switches, buttons, and lights. Select your own items, then click "Submit."
Choose an area where the bridge lives (which doesn't really matter), and you're finished with this part. In your Home Assistant app or web panel, look in the Notifications section for your new HomeKit pairing code. Open the Home app, then type or scan in that code. You'll be warned that this bridge is an "Uncertified Accessory"; click "Add Anyway." You'll see many new items are available in the Home app. Perhaps too many.
If there are entire categories of devices you didn't expect to show up here, you might consider removing your Home Assistant bridge and re-adding it with fewer devices or categories. Click the Home icon in the upper-left corner, choose "Home Settings," then "Home Hubs & Bridges," then click the bridge you added and scroll down to remove it.
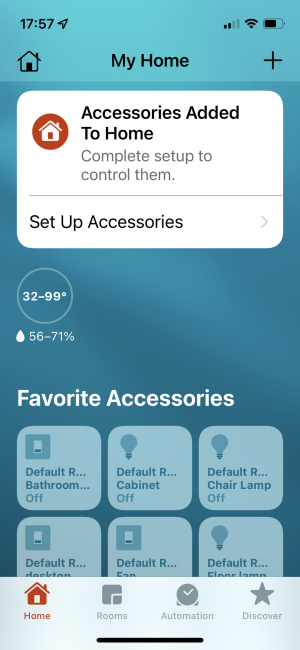
Otherwise, you'll want to do what the Home app tells you and set up all your accessories. The Home app (at least in iOS 15) is unforgiving of devices you haven't set up, leaving a reminder on the My Home page until everything is named and placed in a room. The same goes for devices that have gone missing or those that are unresponsive.
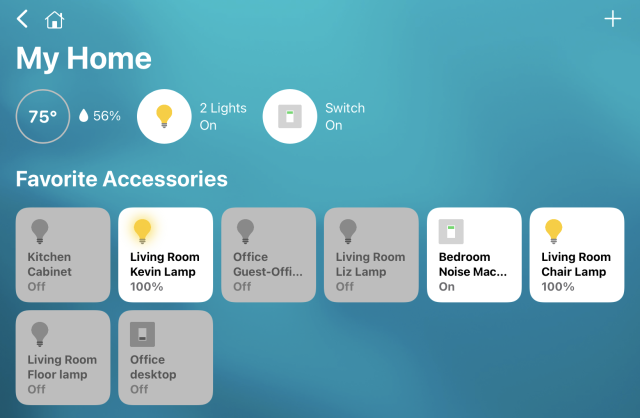
After that fiddly setup, you get the payoff: lots of devices inside HomeKit that Apple would never have allowed. Here's my Home setup, featuring non-HomeKit-friendly smart bulbs, switches, temperature and humidity sensors—even a wake-on-LAN toggle for my desktop PC:
In iOS 16, you'll have access to some of your Home controls on your lock screen, in small or large Lock Screen widgets, making the pain that is HomeKit setup even more worthwhile.
So long as your Home Assistant instance is running, it communicates between HomeKit and your non-HomeKit devices. You can use your bootleg, "Uncertified" devices in HomeKit automations, in iOS Shortcuts, with Siri, and with other Apple-y systems. If you want access to everything when you're outside your house, you'll still need to .
There's a non-zero chance that after getting to know Home Assistant well enough to set it up as a HomeKit bridge, you might simply want to use Home Assistant to control all your devices. It's not a bad side effect—trust me.
Google and Alexa, too
Home Assistant can provide a similar kind of gateway function to Google Assistant and the Google Home app—and to Amazon's Alexa devices and apps. Google and Alexa tend to support far more devices than HomeKit, so many homes won't necessarily need this. Still, there is the odd device that those ecosystems don't see, particularly some sensors, cameras, and switches.
As with HomeKit, you'll need to set up the devices in a Home Assistant instance first. You'll then need a subscription to . You can try it out free for 31 days without entering payment information. You'll then need to pay $6.50 per month or $65 per year.
With both and , you'll need to enable your Cloud subscription, enable the support inside Home Assistant, add Home Assistant as a skill/device from a mobile device, then activate it all. Similar to HomeKit, you can choose which categories of devices you send along to Alexa or Google to prevent duplication or just limit what your apps and speakers have access to. Once it's set up, you'll be able to yell all your device names at your speakers, hubs, or other Google/Amazon gear.
https://ift.tt/bcZKSks
Technology
No comments:
Post a Comment